I’m really enjoying the latest Digital-Tutors tutorial I’ve been doing: Beginner’s Guide to Concept Sketching. I’d like to think I’m a little more than a beginner, but it looked like a good tutorial and I wanted to start with the basics, after all, nothing is more valuable than having the basics solid in your head!
Working through the exercises, I was pleasantly surprised to realise that, actually, my skills are all right and I need to have more faith in myself. Having the tutor really stress how important it is to forget quality and focus on getting the essence of an idea down quickly, almost gave me the ‘permission’ I needed to let go and be free with my drawing. Perfectionism is my biggest fall down and always threatens to get in the way of my creative process… it’s my number one priority to conquer it. I’ve learnt time and time again that it never pays to be precious with art, certainly not in the early stages anyway.
Logo Ideas for ‘The Radiant Robot’Woman with sword gesture drawingsMech mermaid silhouette sketch – had to get a mermaid in there somewhere 😉Countryside speed paint
This is a bit of an odd one but it’s the first bit of 3D work I’ve done in a little while so thought it was worth a mention.
Basically my grandparents are going to be moving into a little flat soon, and well, my Gran is possibly the biggest fuss-ass, stress-about-everything, worrier on the planet. She’s flapping like there’s no tomorrow about ‘oh my god, is all the furniture going to fit.. what am I going to have to get rid of.. blah blah blah’. So naturally, with my knowledge of 3D, I offer to build her flat and all her furniture in virtual 3D space – not that she understands what that means at all.
I’m just doing a rough job, the sooner I can get everything modelled to a recognisable state and show my Gran to put her mind at rest the better! I am using pictures of her furniture for reference though to try and make it as good a representation as possible, as I said I don’t really know if she’ll understand, but I’m hoping it will blow her mind 😀 It’ll be interesting showing her in any case haha.
I’m still in the process of modelling everything, but I’ve blocked everything out to scale to get the layout (I was excited to see if it all fit myself haha). Takes me back to my Sim-playing days.. except, I have to make everything myself, and it’s taking a hundred times longer (and that’s saying something because, as I hope most Sims players would know, it takes a good DAY to build a decent Sims house).
Looking pretty rough at the moment but I might be tempted to have a go at learning some fancy rendering if I get a chance! But yeah, not your every day 3D project but it’s been a fun and gentle way of getting myself back into the loop of 3D. I have to confess, I am guilty of abandoning it somewhat in the past few months, which I blame on the fuss of moving back home.. working at my job-for-the-moment job.. Christmas etc. But I have no excuses now!
Just a quick one, got to do the obligatory graduation post!
“I don’t want to leeeaaave” “But we have to graduate now!”Sharp blow to the head in 3.. 2.. 1..
Just as I expected, third year was over in a flash, and while it was sad to leave Uni (as I’m sure you can tell from the above picture), come November I had the joy of graduating! So exciting, dressing like a wizard, drinking fake champagne and eating canapes! Safe to say I was just a tad nervous at the prospect of walking across a stage, in heels, in front of hundreds, to collect my degree – made worse by the fact I was the first of my entire course, thanks to being blessed with the surname ‘Ashfield’, bane of my life. Well I’m relieved to say I didn’t faceplant. It was an amazing day and definitely one to remember, what a wonderful way to round up my Uni experience 😀
It’s true what they say, Uni really is some of the best years of your life and you make friends for life. I’m sad to have left the NCCA and all the great friends, colleagues and lecturers I met there. BUT, onwards and upwards and onto the next chapter: finding an actual job!
This post is a bit late coming but hey, better late than never. I had hoped to do more regular updates during the course of this project but just as I thought, my blog got somewhat abandoned in the madness of third year!
So after several weeks of intense work in the lead up to the Major Project deadline, everything finally came together and the final thing was produced! Take a look..
Plenty of things happened between my last post (where I discussed the robot’s character design) and the production of the final thing, so I’ll touch on some of the key things that happened along the way. If you’d rather skip the waffle and just see my contribution to the project, here’s my breakdown reel:
After completing the final design of the robot, I handed it to our Character Modeller so he could get the modelling under way; in the meantime I had some other design work to do. Firstly the design of the cabin; it would only be seen for a very short time so for this reason I didn’t spend too long on it, but we wanted ensure it was given an in-keeping steampunk twist and looked sufficiently worn and battered to reflect the desolate, arctic environment in which it sat. In retrospect, my concept was far too clean and new looking, so when it came to texturing I made a conscious effort to dirty it up. Also, we had initially hoped to have a shot of the old man’s gloved hand placing the fuse into the robot’s chest at the start of the animation, hence the glove designs below, but sadly this was cut so we could focus our efforts on more important things and achieving an overall more polished finish.
Cabin concept
Once the robot model was finished it was handed to me for UV mapping. Before starting this I wanted to give the mesh a once over to check for anything that would cause problems later on with texturing – I’m glad I did! No disrespect to the modeller, he did a great job, but I found a few pesky random vertices and accidental extrusions, so I spent a little while cleaning up the mesh. It was important that edge loops were evenly spread and polygon size was consistent across the model so that when it came sculpting in Mudbox, something that would be key in creating the battered, crude look, the mesh would subdivide nice and evenly. The actual UV mapping went pretty smoothly – I don’t know what it is about UV mapping but I quite enjoy it, it seems like the kind of thing that would be mind-numbingly boring. I think it’s cause it satisfies my perfectionist/mild OCD tendencies. 😛 I did each section manually using planar or cylindrical mapping where appropriate, sized the individual UV shells relative to their scale in the model, and laid them out as efficiently as I could to make use of as much of the texture map area as possible.
Head UVsChest UVs
My next job was sculpting and texturing, something I’d been looking forward to! After a couple rough tests and feedback from the group, we decided on a rusty, bronze colour for the robot, complete with thick, messy welds, which we thought would make him stand out nicely against the snowy environment. I started by bashing him up with sculpting; after giving him a few substantial dents and an all over dimpled, imperfect texture, I went on to painstakingly sculpt every gnarly, bobbly weld seam, which I think created a really nice effect, but I do wonder if it was worth it considering how much they are seen in the animation. I guess it was for the really close up shots which do show them off very nicely! I can’t help but think there would have been a quicker way of doing it though.
Sculpting and texturing in Mudbox
Final robot sculpt and textures
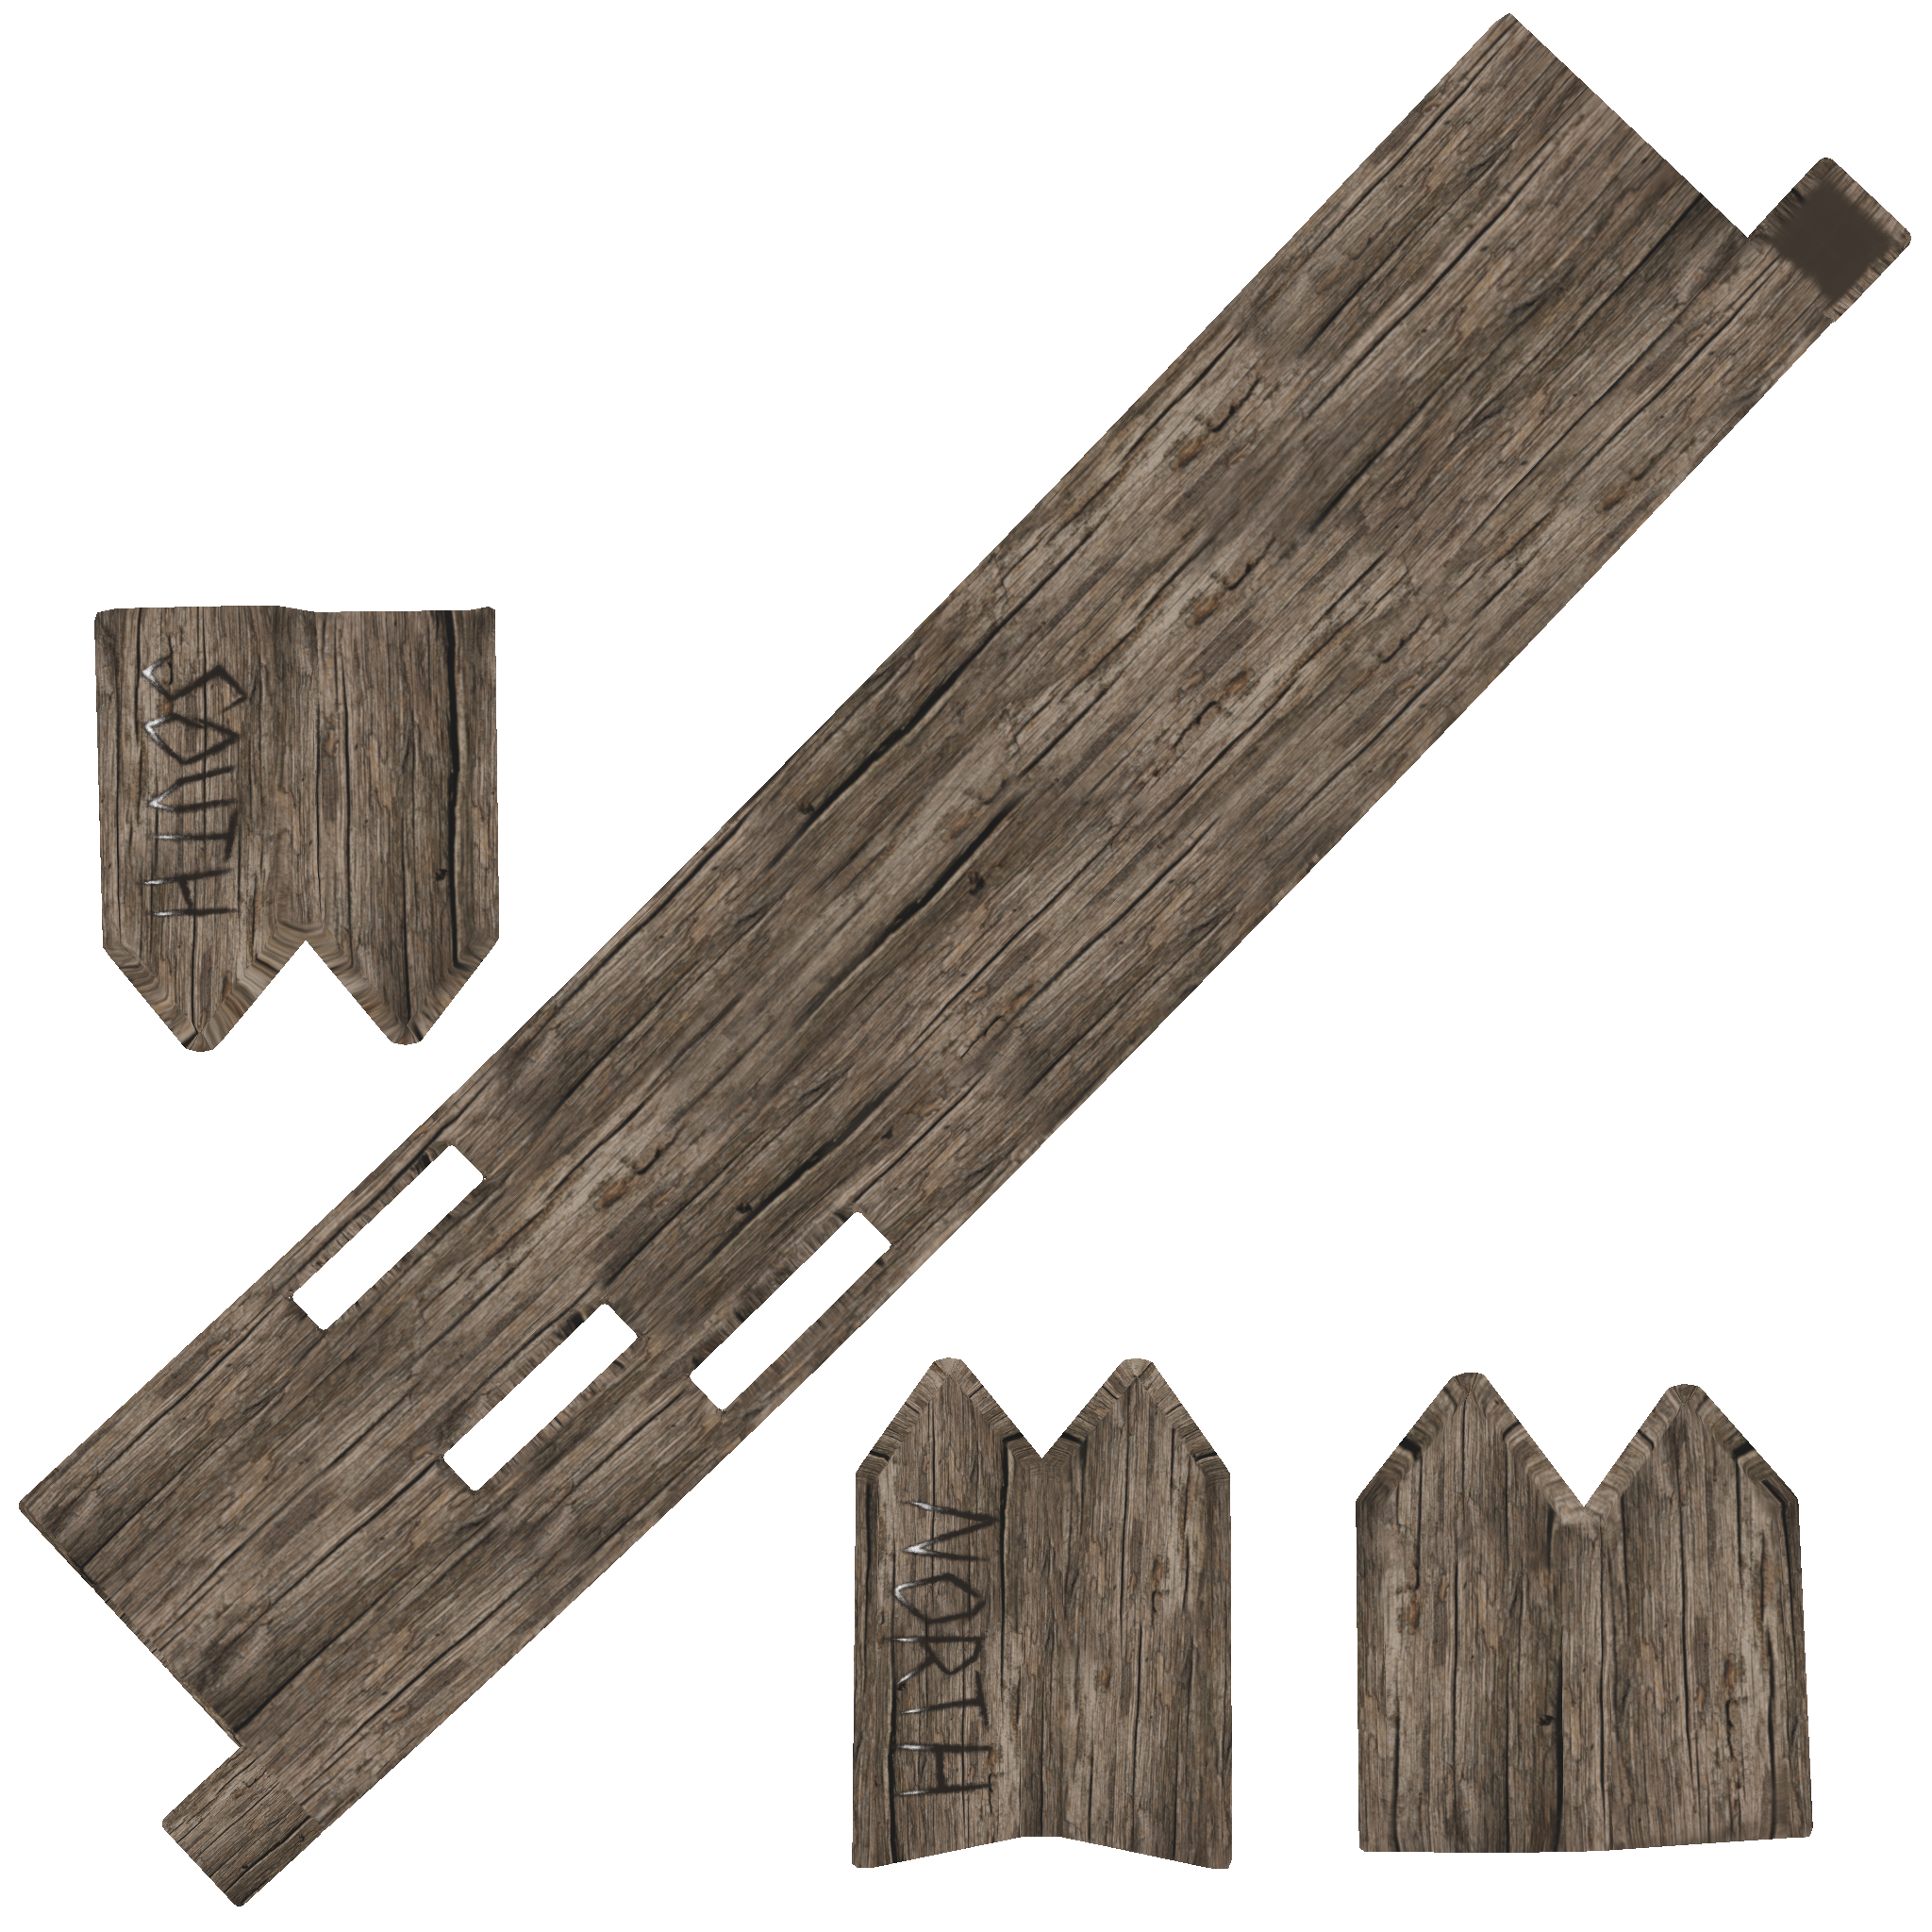
Getting the robot finished was priority, as he would be seen in virtually every shot, but once he was out of the way I had the more minor texturing jobs of the cabin and the wooden sign, both of which would only feature on-screen for a few seconds. As you can see in the texture maps below, the areas that would not be seen in shot, I didn’t waste time texturing. Time was of the essence!
Final cabin sculpt and textures
A challenging issue we faced with the textures, which concerned me in particular, was getting them to look as good as they did in Mudbox when assigned to the models in Maya. I had spent a long time getting them to look good in Mudbox, but it seemed they weren’t looking half as good in the Maya scene. This was to be expected to some extent; the Mudbox viewport has optimal lighting conditions, whereas the lighting in our scenes was very different. However with the sculpts for example, certain details weren’t showing up, or were showing up in strange ways, so I really wanted to try and work on getting them to look their best so all my hard work wouldn’t go to waste! I spent a little playing around with different ways of exporting the sculpts with my director, Rachel, and we found vector displacement maps to be the most effective. After working her parameter-tweaking magic, Rachel got the sculpts and textures looking good in Maya, much to my relief!
Rachel’s work on the treesOllie’s work on the Northern Lights effect
While I had been texturing, my colleagues had been busy working on the animation, environment and special effects. Seeing the first few finished animation sequences was really exciting – it was so cool seeing the robot come to life (probably because I’d spent so long staring at him being static haha). As the assets, animation and effects started to come together, it was then a team effort to get the final scenes ready for rendering as soon as possible, which in an education institute with limited machines and students in their hundreds all trying to render at the same time, was quite important! It was a fight to the death for computers. Pretty comical, everywhere you looked there were computers guarded with protective notes to the effect of ‘RENDERING – DO NOT TOUCH’.
A still from the final animation
I have to at this point give my sister a special mention, who did an amazing job of putting together an original instrumental piece of music for us last minute. Music had not been the top of our priorities in the final few weeks of production, as it was not something we would be assessed on, however we always knew we wanted the animation to have some form of audio to give it the proper finish. Initially we had planned to just source some fitting music or sound effects online, but then I had the lightbulb thought ‘Oh yeah.. my sister studies Music’. I don’t know how I didn’t think of it before! It was great collaborating with her and we were all really impressed with how quickly she fixed up a lovely little fitting piece to complete the animation! You can check out her work here: https://soundcloud.com/lunayru
To round this post up, the Major Project was a long old journey, but it actually wasn’t as stressful and crazy as I thought it would be. I guess that comes down to my colleagues who were a pleasure to work with, the helpful lecturers who were there to offer support and advice every step of the way, and the relaxed, friendly and all round awesome working environment at the NCCA. It was an absolute joy and I was thoroughly pleased with the outcome. 😀
Unfortunately I have to start this post with the sad news that my team, Melon Cauli Studios, were unsuccessful with our Dare to be Digital application, however the process of applying was a great experience nonetheless and I got to produce some cool game art, so I think the whole thing is deserving of a blog post!
Dare to be Digital is a video games competition at Abertay University in Scotland, where teams of 5 spend 9 weeks during the summer developing a video game prototype. Teams are mentored by industry professionals and at the end of the competition the prototypes are displayed at an event where the general public and industry professionals get to play and vote for the games. The winners go on to attend the BAFTA Video Games Awards to compete for the ‘Ones to Watch Award’ – so yeah, a real shame we didn’t get in, would have been an awesome opportunity, but to look at the silver lining side of things, I can now focus my efforts on my Uni work and stay in Bournemouth for a while after my deadlines/exams are over to enjoy my freedom and make the most of my last few months of being a student! 😀
But anyway, back to our application, we pitched a game called Wednesday’s Child, a 2.5D puzzle platformer game where the player takes control of a young boy and must use imagination power to avoid enemies and puzzle solve their way through the game, in order to eventually rescue the boy’s mother, who has been taken to an asylum following a mental breakdown (cheery :P). Our video pitch should explain everything a bit better..
Here are the puzzles featured in the video a little clearer and with their solutions fully explained (credit for the puzzle designs go to the level designing genius Liam de Valmency! http://liamdev.com/)
Basic wall puzzle
Solution: Transform crate into wall to block enemy’s line of sight. Drop down from ledge and go right towards goal.
Enemy-flinging
Solution: Transform crate into wall. Drop down and collect inspiration (to allow crate to fan transformation). Transform rug into trampoline. Transform wall into fan. Wait for enemy to get blown onto the trampoline and flung onto the above ledge. Go right towards goal, either by turning the trampoline back into a rug first, or jumping over it.
Fan-jumping
Solution: Drop down and collect inspiration (to allow crate to fan transformation). Climb ledge and stand to right of crate. Transform crate into fan. Use fan-boosted jump to get over the wide gap.
Six screen puzzle – Breaking into the castle
Solution: Climb ledges to go up a screen. Push crate onto button to open top gate. Stand on crate, transform crate into wall. Wall is too wide to fit into button groove, so the gate closes again. Jump onto ledge. Turn wall back into crate. Gate opens again. Move right. Transform both rugs into trampolines. Use timed jumps to avoid turret fire and reach lever. Pull to open lower gate. Return using timed jumps. Drop down to button, go right, drop down. Go left to collect inspiration. Go back to bottom-centre screen. Turn crate into fan, enemy will be blown to bottom-left screen. Go back to bottom-left screen, stay on ledges. Turn lamp into distraction object, wait for enemy to investigate. Drop down, go right, get inspiration. Go through level to reach lamp next to the castle. Use inspiration to transform lamp into hot air balloon/rocket/spaceship. Travel up, enter window.
Gothic chamber concept – Imagined style
Gothic chamber concept – Real world style
Otherwordly castle concept
The Dare guys gave us some useful feedback which was very much appreciated after all the hard work we put in! The main points they made were:
Puzzle platformers are very common and need to stand out for anyone to take notice. Without fun game mechanics the appeal is very limited for this game.
The focus on story and themes is too heavy and there is no detail of how the imagination mechanic will actually be fun to use.
The idea of changing a crate to a wall isn’t exciting, this is a fantastical world, it’s a lost opportunity if such mundane objects are used.
The game would suit a console better. The PC isn’t being used in any novel way here.
All fair points, while I’m disappointed we didn’t get in, I can see where they’re coming from and at the end of the day they’re the experts and they know what will sell and what won’t! We definitely could have pushed the imagination theme by using more exciting object transformations. They did however say we had a passionate pitch, good team chemistry and a clear set of goals, so you never know, something may come of Wednesday’s Child in months to come! But in the mean time I’ll crack on with my Uni work as it really is crunch time with the Major Project now. Good luck to the lucky teams that make it into the competition and I look forward to seeing their progress over the summer!
Phew, another project handed in. Can’t believe how quickly this year has gone already, now I just have Major Project, a small compositing assignment and my exam to revise for!
The point of this project was to explore, experiment and innovate in a specific field of computer animation. I chose to create a digital artefact that embodied the formal qualities of a Tamara de Lempicka painting (which in less fancy terms just means make something in 3D in the style of Lempicka :P).
Photorealism has been the main driving force behind CGI for years now, and with my largely traditional artistic background, I felt like I wanted to break away from photorealism and use CGI in a more artistic, stylized way. And who better to study than my favourite artist who I’ve revisited time and time again in my art studies, only all the other times I’ve been using the traditional medium of painting.
I love Lempicka’s style for a number of reasons: the bold colours, the high contrast shadows and clean-cut, angular forms, the immaculate smooth blending of paint with not so much as a hint of a brush stroke, and the captivating subject matter – sexy, bedroom-eyed women in luxurious dresses.
On the left, “Young Lady in Gloves”, 1930, Tamara de Lempicka. On the right, my A-level Art final piece.
(please refrain from laughing at my slightly robotic, monotone voice!)
I’m pretty pleased with how this project turned out. The end piece was a little bit dodgy in terms texturing and rendering. The face texture wasn’t great due to the roughly modelled mesh causing texture stretching and the automatically unwrapped UVs causing small problematic areas that wouldn’t texture properly. Also, there is a slight flickering on the models at the seams of the UV texture maps in the final render. That said, these minor problems aren’t overly noticeable in the finished piece, so on the whole, I think the piece has a strong resemblance to the original painting and I think I achieved what I set out to do!
As Art Director, I was responsible for the character design of the Robot. I tried out a few different head shapes and features, but we came to the decision that we wanted our robot to be heavily influenced by the Iron Giant, complete with an austere look and blocky, hinged jaw.
When designing the rest of his body, it was important for me to consider the context of the robot’s creation; it had to be clear from the design that this robot had been roughly put together with whatever scraps of metal this lonely old man could get his hands on, and for this reason we went with simple cylindrical style arms and legs. We were initially going to have ball and socket joints, but decided on hinge joints after our Director pointed out that ball and socket joints are usually biological and wouldn’t theorectically work in a steamwork robot – or not the crudely built, not-so-cutting-edge kind of one that we were going for!
Rachel also around the same time found a cool robot rigging tutorial whereby a standard rig drives an additional underneath rig which rotates the individual hinge parts in a realistic and mechically correct way that would be seen in a real-life, physical hinge joint (See video here: http://youtu.be/KkWEt_fRlxo). So began the designing of technically possible joints for our robot! During this I had to bear in mind that the robot would need every rotation in his joints that a human does, which was a challenge when it came to the hip joint where we would need rotation in all three x, y and z axis.
The Major Project is arguably the most important project I have this year. For mine, I’m working with three of my coursemates to produce a short, visually strong character animation about the Northern Lights. We’ve been working on it since October so we’re well into production now, but I’ll try and give a bit of an introduction as to what it’s about, and show where we’ve got to so far through a series of posts.
Our animation follows the journey of a steamwork robot whose mission it is to climb to the top of the mountain in order to release the Northern Lights into the sky. He is the invention of a lonely old man who lives in an isolated cabin amongst the snowy mountain range, and whom we are to believe has also created the beautiful phenomenon that is the Northern Lights. During his journey, the robot must battle through ferocious, high-speed winds and stormy blizzards, until he reaches the peak of the mountain and fulfils the task he was built for.
The team is as follows:
Rachel Laura Cooke – Director, Rigger, Lighting, Rendering
Lucy Ashfield (me) – Art Director, Cinematographer, Texture Artist
Alex Mortimer – Character Modeller, Animator
Ollie Walter – Environment Modeller, VFX Artist
After a bit of making a fool of myself by posing with a broom and research into fantasy/medieval armour, I came up with this..
This project is all done and handed in now; modelling her was quite a challenge! It’s safe to say I was a bit over-ambitious with the design considering my modelling skills and the time I had left. I had to alter the design slightly where I had problems, but on the whole it turned out alright! I’ll post some pics once I get a nice render 🙂